Podcast: Play in new window | Download | Embed
Subscribe: Apple Podcasts | RSS
 We spent a day filming and installing front speakers and amplifier on a 2015 Harley-Davidson Street Glide Special and a 2015 Road Glide Special. The components we used are from a company called Soundz Bagger Audio. We had never heard of this company until several years ago when they came out with a device that would allow you to retro-fit your pre-2019 Harley touring model's Boom Box Infotainment System to the new Boom Box GTS Infotainment System, which comes on 2019 and newer touring models. That device from Soundz Bagger Audio is no longer needed, as Harley-Davidson has since made that retro-fit possible at a cheaper cost. (Make sure to listen in to this podcast episode to get even more details than mentioned in this article)
We will be releasing a complete Soundz Bagger Audio front speakers and amplifier install video. So, keep checking back on our Premium Tutorial Videos Page Here. We show both a Street Glide and Road Glide install in our video!
Note: We have no affiliation with Soundz Bagger Audio. We simply bought their products for real-world testing & review.
Components and Ordering:
When you visit the Soundz Bagger Audio website, there are many options for you to choose from depending on your audio needs for your Harley-Davidson. Once you select the speakers, amplifier, and other components you want, you submit a form and they call you the next business day. You can't actually purchase online using your card and you place your final order over the phone.
SUPPORT US AND SHOP IN THE OFFICIAL LAW ABIDING BIKER STORE
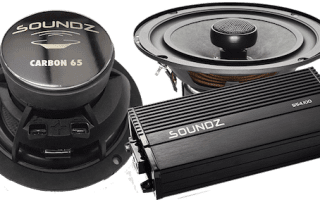
For our install, we selected the Soundz Iron GT front fairing speakers and the SM4.100 4 channel 861 watt front amplifier. We did not do any rear speaker lid or front lower speakers for this install, but you can certainly add them on if you like. The Soundz Baggers Audio systems come with a pre-wired harness, all wires, and hardware for ease of installation. Interestingly, after we completed our basic order for submission, it was never mentioned nor recommended that we'd need a Techno Research Single License Scan Tool (SC-Alaris) to flash our Harley Boom Box system to their parameters after install.
The next day we received a call to verify our online submission. It was at that time we were told we'd need the additional $150 scan tool to flash the Boom Box after install. Additionally, the online price we were given was a bit different than the final price.
The final cost was $1100 for the speakers and amplifier, $150 for the scan tool, and $30 for shipping. Of course, all wiring, harnesses, and hardware are part of this package. So, the total price we paid was $1,280 US. The company was professional to deal with. This price is in line with other quality audio component installs we've done here at Law Abiding Biker™ Media, such as J&M, Rockford Fosgate, Harley Boom Audio, and Cycle Sounds.
Digital Signal Processor (DSP)
It's also worth noting, that with the Soundz Baggers Audio systems, you can add on an additional Digital Signal Processor (DSP), which will allow you to really spend time and dial in exactly how your system sounds based on your personal taste. We did not get this component and it's not required.
Receiving the Components:
We received the components timely. We were immediately impressed with the quality of what we saw. The speakers had large heavy magnets, dwarfing the stock Harley speaker magnets. The amplifier looked and felt of quality and had additional plates added to it, helping weather seal and protect it. The wire harnesses were neatly organized, heavy-duty, and had all the plugs you'd expect to see in a 2014 and newer Harley. All items were packaged very nicely. The scan tool came in a nice case and had the proper interface cables.
Install Process & Lack of Instructions:
We began filming and installing the Soundz Bagger Audio system on our Harley. Be aware, there are no install instructions that come with the components. There is a document included that tells you to go to their support tab on their website. Once there, we found many .pdf documents in an unorganized fashion. Some help a bit and others helped in no way at all. You are really on your own with no real support once you get the components delivered. However, with our very detailed install tutorial video, you'll easily get through it. We are excited, as we know our video will help so many bikers worldwide not be frustrated with the lack of instructions.
 CHECK OUT OUR HUNDREDS OF FREE HELPFUL VIDEOS ON OUR YOUTUBE CHANNEL AND SUBSCRIBE!
Luckily, with our experience with installing many Harley audio systems over the years, we were able to get through it. We believe that Soundz Baggers Audio mostly sells their systems at rally's and do the installs themselves, which is why they have not really produced detailed and thorough instructions for those that buy online.
We learned that the Soundz Iron GT speaker magnets fit fine inside the stock Street Glide speaker pods. However, with the Road Glide, you must cut a small in the side of the stock speaker pod so it can fit. This is not big deal and we'll show you how to do it in our video. The kit comes with a template, so you can cut the hole in the proper place.
We did find that the harness and the way everything hooked up was unique and a bit different compared to some other systems we've installed. All the wires and harnesses can be very confusing, but we show you in detail in our tutorial video on exactly where to plug things in.
The amplifier installs a bit differently between the Street Glide and Road Glide models, but we show you both in our tutorial video.
Amplifier Settings:
The instructions online do show you where to set certain switches and dials on the amp, but we found one setting was wrong for our setup and we reveal that in our video.
Flashing the Harley Boom Box Infotainment System:
Once the Soundz Bagger Audio system was installed, it was time to flash the Harley Boom Box using the Techno Research Single License Scan Tool (SC-Alaris) that we purchased through Soundz. Again, there are no instructions at all either on the Soundz website or the Techno Research website that will assist you with how to do this.
Inside the case of the scan tool is a sticker. It gives a URL to go to on the Techno Research website where you can download the installer application on your PC. Be aware, this is a PC only installer application and they don't support Mac, which is very archaic for the year 2020.
After you install the Techno Research software on your PC, there are some very basic listed instructions to follow but they lack in detail. We were able to get through the flash of the Harley Boom Box Infotainment System and we reveal exactly how to do this in our tutorial install video.
Within the scan tool is a pre-determined “canned” type flash that will set the Boom Box system to the desired settings for the Soundz system. There are procedures, but essentially, you hook your PC laptop to the scan tool and the scan tool to the diagnostic port on your Harley and run the software.
Note: This Techno Research scan tool is licensed for a single-use. Once you connect it to your Harley and run the software it is married to that vehicle identification number (VIN) forever. It will not work on another Harley.
Overall Sound:
The Soundz Bagger Audio System we installed sounds very clean and is plenty loud. With the flash and suggested amplifier settings, you can turn the Boom Box volume all the way up with little to no distortion. It can be heard just fine when riding at freeway speeds while not having to turn it all the way up.
As expected on a system like this, there are mostly mids and highs and not much base. Base gets lost anyways at freeway speeds, so focusing on the mids and highs is what many of these aftermarket Harley stereo system companies do. At full volume, our decibel meter was reading steadily between 100 dB and 110 dB depending on the song playing. This is in line with the Harley Boom Audio, Rockford Fosgate, and J&M systems we've previously installed.
Remember, you could certainly dial the sound in even more if you purchase and utilize the digital sound processor (DSP).
New Free Video Mentioned:
Sponsor-Ciro 3D
- CLICK HERE!
- Innovative products for Harley-Davidson & Goldwing
- Affordable chrome, lighting, and comfort products
- Ciro 3D has a passion for design and innovation
Sponsor-RickRak
- CLICK HERE
- The Ultimate Motorcycle Luggage Rack Solution
- Forget those messy straps and bungee cords
- Go strapless with a RickRak quick attach luggage system & quality bag
Sponsor-Butt Buffer
- CLICK HERE
- Want to ride longer?
- Tired of a sore and achy ass?
- Then fix it with a high-quality Butt Buffer seat cushion?
New Patrons:
- Earnest Beck of Dauphin, PA
- Tony Ulrich of Riverview, Florida
- Ron Bridgefarmer of Gainesville, GA
- Doug Hulme of Littleton, Colorado
- Joe Mulhair of Hermitage, Pennsylvania
- Kenneth Maxwell of Gallatin, Tennessee
- Michael Hiatt of Livermore, California
- Brandon Burr of Edmonds, WA
- Juan Gomez of San Antonio, Texas
If you appreciate the content we put out and want to make sure it keeps on coming your way then become a Patron too! There are benefits and there is no risk.
Thanks to the following bikers for supporting us via a flat donation:
- Clinton Havens of Lemoore, California
- Michael Lysik of Yorba Linda, CA
- Martin Gavrila of Waco, Texas
Join the Free Email Club!
If you appreciate this free information make sure to join the thousands of law abiding bikers that have already joined the free Email Club! You will be notified of new useful motorcycle content and techniques as we put them out. Join the Community now!
Soundz Bagger Audio System for Harley
-
Overall
Summary
The build quality and sound of this amplifier and speaker system are very good. The sound is clean and you can turn the volume all the way up on the Boom Box with little to no distortion. You can hear the speakers just fine at freeway speeds. The online .pdf documents provided are disorganized. They are either missing or completely lack in detail for installation. But, with our detailed tutorial video, you'll have a successful install.


Leave a Reply