-
Save money now! Install aftermarket handlebars on your Harley Davidson yourself!
-
Fact: Dealerships can charge $1,000 and up for this project
-
Do it in your garage or on your patio right on the kickstand!
-
Trick your Harley out the way you want it!
-
No special motorcycle lifts or jacks needed!
-
Have the pure satisfaction of working on your own Harley!
A Video by Bikers for Bikers!
This tutorial video will work for any similar models of Harley Davidson Motorcycles. We used a Harley Softail for this project.
Basic Tools & Items Needed
Tools & items needed: (affiliate links)
- Screwdrivers (standard & phillips)
- Torx head wrenches (standard sizes)
- Standard box end wrenches (American & Metric)
- Wire strippers (a pocked knife could be used instead)
- Pliers (standard & needle nose)
- Butane mini torch or just a standard lighter
- Allen/Hex head wrenches (American)
- Transmission oil (one quart)(replacement if you have to put extended clutch cable or hydraulic clutch lines on)
- DOT 4 brake fluid (if replacing with extended brake lines)(for bleeding lines)
- Transmission cover gasket (If you have to put extended clutch cable or hydraulic lines on)
- A simple hand operated brake line bleeder vacuum pump
- Basic 40W soldering iron kit (Not necessary)
- Solder (Not necessary)
Parts, Kits, & Bars we used | Important Information
- Burly Handlebar Cable Installation Kit For Harley (affiliate link)
- NOTE: At the time of this video, Burly had no kit for our 2016 Dyna Low Rider S we used in this video. (specialty bike)
- We did a custom cable order for this project (see below for more info)
- However, Burly does have cable/wire kits for many other years and models of Harley's, so make sure to check.
- West Coast MX 12″ T-Bars (black)
- Please tell them Law Abiding Biker™ Media, Inc sent you
- Arlen Ness Polyurethane Riser Bushing Kit For Harley (affiliate link)
- Drag Specialties Turn Signal Fork Clamp-49mm – 2040-1127 (black)
Custom Cables and ABS Brake Blocks you can use:
- Clutch cable, upper ABS brake line, & front ABS brake block
- Magnum Shielding (black pearl)
- NOTE: This is where we ordered our ABS brake block with lines for this project
- Other options for front ABS brake block (this would work too)
Additional Information:
Stock 2016 Dyna Low Rider S stock cable lengths
**Our Measurements (always measure yourself)
- Stock clutch cable= 60 inches
- Stock upper ABS Upper Brake Line= 23 inches
Stock 2016 Dyna Low Rider S handlebars/risers= 6 inch risers
- We installed 12-inch Westcoast MX T-bars
- We ordered +8 inches over stock cable/line length
- It worked out just fine
- Now that we have done this project, we can tell you that ordering 6″ over would have worked just fine too. We have some extra cable.
- We ordered +8 inches over stock cable/line length
You absolutely do not have to use the same kit or bars we used in the tutorial video. They all wire and go on the same way. Please consider using the below affiliate links to purchase your bars and install kit.
Revzilla | Amazon | J&P Cycles
A Video by Biker for Bikers
Fact: Dealerships and mechanics can charge over $1,000 to put aftermarket handlebars on your Harley Davidson motorcycle. It is often times well over that amount, yet we know you can do this project yourself by watching this tutorial video. We teach you everything you will need to know and walk you through the entire process.
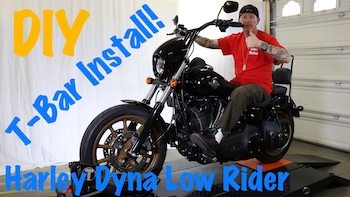
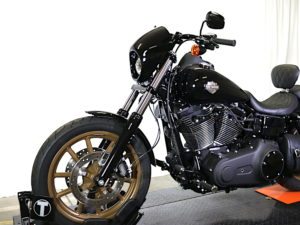
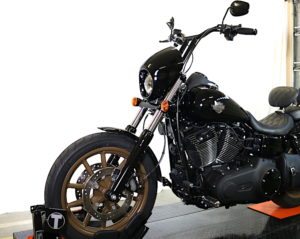
In this tutorial video, we install 12″ aftermarket T-bar handlebars & on a Harley-Davidson Softail motorcycle. We wired the new bars internally for that clean look. This #1 rated tutorial video will not only work for Harley-Davidson Dyna models, but also for Softail and Sportster Harley models.
Check out our Handlebar Install Video Page and pick the right video to suit your project. We have other Harley handlebar install videos on that page.
You will not find a more thorough aftermarket handlebar install tutorial video out there. It is a video by bikers for bikers. You can put new handlebars on your Harley right in your garage or on your patio right on the kickstand! There are no specialty tools or motorcycle lifts required and I will give you a list of items you will need and things to think about later in this article.
- Purchase it now and stream it immediately just like a YouTube video as many times as you like!
- FYI: Here is just one an example of one of our many completely Free tutorial videos, so you can bet our for purchase videos are that and more. Click here to see the detail in that video. And while you are there subscribe to our YouTube channel.
The video is high definition and it's like you can reach out and turn the wrenches with us. In this video, we skip no steps and we have no doubt that after watching you can do this project with ease. Tons of bikers all over the world now have aftermarket handlebars on their Harley's because of this exact video. We are very detailed in our explanations and we want you to be successful. That is where we get our greatest satisfaction, hearing of successful installs!
There are many aftermarket handlebars for your Harley Davidson motorcycle in every shape, color, and size imaginable and the cost can vary just as much. There are many companies making quick connect/install kits. Most of these simple kits are the same and come with a bundle of colored wires for extending wire harnesses, quick connectors, and shrink tube. If you are going with taller style handlebars then the kit may also include an extended clutch cable and extended front brake lines.
Note: If you want to put heated grips on your Harley Davidson then now is the time, because you will be right there with everything apart. We can help you complete that too with our Harley Davidson Heated Grips Install Video.
Many of these handlebar wiring kits have quick connect pins for extending the stock wire harnesses. You usually take off the stock plastic Harley wire plugs, extend the wires with the quick kit colored wires, and then plug back into the stock plugs all without soldering. You can always snip the quick connectors that come with the wire kits and solder if you are more comfortable with that.
There are also kits with the OEM plugs on the end of the wire extensions to quickly hook up after soldering extensions in. Either way, we have you covered in this video. We filmed several different kits and show you how to proceed depending on your particular kit, which aren't much different.
We can tell you from experience that you will want to have a soldering iron and solder on hand. Often times because of bulky plugs it may be necessary to solder a bit to make things clean and easy. Your extension kit may require soldering. Don't worry, we make soldering so easy and show you exactly how to do it properly in this video.
Most the time you can go as tall as 12″ aftermarket handlebars without having to replace wires, cables, and lines. I said, “most the time”, so you need to do your own research for your particular year and model before you begin your project.
Tools & items needed: (affiliate links)
- Screwdrivers (standard & phillips)
- Torx head wrenches (standard sizes)
- Standard box end wrenches (American & Metric)
- Wire strippers (a pocked knife could be used instead)
- Pliers (standard & needle nose)
- Butane mini torch or just a standard lighter
- Allen/Hex head wrenches (American)
- Transmission oil (one quart)(replacement if you have to put extended clutch cable or hydraulic clutch lines on)
- DOT 4 brake fluid (if replacing with extended brake lines)(for bleeding lines)
- Transmission cover gasket (If you have to put extended clutch cable or hydraulic lines on)
- A simple hand operated brake line bleeder vacuum pump
- Basic 40W soldering iron kit
- Solder
As you can see, you don't need that much and can do this project right on the kickstand. So what are you waiting for? Don't waste your money taking your Harley to a mechanic and spend over $1,000 for this project. Get the tutorial video now and get started! Have the satisfaction of working on your Harley and completing your own projects.

Leave a Reply