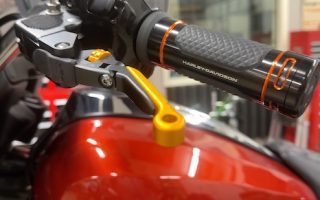
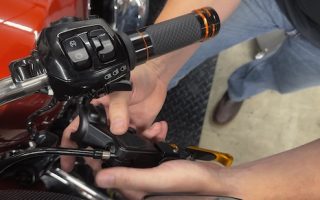
Are These the Best Harley Accessories Yet? Ciro Chicane Collection
We're thrilled to introduce an exciting new line of motorcycle accessories from Ciro, available in the Law Abiding Bikerβ’ Store. Check out the product links below for full details and fitment information.
The Chicane Collection is a premium lineup of hand and foot controls designed to enhance your bike's comfort, style, and functionality. In this article (and our accompanying video), we'll walk you through the features and benefits of these high-quality accessories.
SUPPORT US AND SHOP IN THE OFFICIAL LAW ABIDING BIKER STORE
What is the Chicane Collection?
The Chicane Collection by Ciro includes:
- Shifter Pegs β Available in standard and extended lengths.
- Brake Pedal Pads β Ergonomic and stylish, designed for better safety and comfort.
- Rider and Passenger Floorboards β Adjustable positions for a custom fit.
- Foot Pegs β Versatile for highway peg use or as passenger footrests.
- Isolated Grips β Designed to reduce vibration and improve grip comfort.
- All parts are available in chrome or black
Why Choose Ciro 3D?
CHECK OUT OUR HUNDREDS OF FREE HELPFUL VIDEOS ON OUR YOUTUBE CHANNEL AND SUBSCRIBE!
Ciro's products are crafted for durability, functionality, and style. The Chicane Collection is inspired by 2024 Harley-Davidson models but offers fitment for older bikes as well. Check the Law Abiding Bikerβ’ Store for compatibility with your specific motorcycle.
Key Features
- Adjustable Floorboards
- Adjustable positions for a tailored riding experience.
- Larger size than stock floorboards for added comfort.
- Raised lugs for superior grip and safety.
- Ergonomic Grips
- Vibration-dampening design for a smoother ride.
- Optional Throttle Wing (a built-in cramp buster) for long-distance comfort.
- Fit options for throttle-by-wire and cable-controlled bikes.
- Shifter Pegs
- Available in two sizes for customization.
- Easy installation and sleek design.
- Brake Pedal Pads
- Engineered for better ergonomics and safety.
- Pairs perfectly with extended brake pedal arms (also available in our store).
LISTEN TO THE LAW ABIDING BIKER PODCAST!
Supporting Bikers Worldwide
When you shop in the Law Abiding Biker Store, you're supporting a biker-owned business dedicated to helping riders across the globe.
Ready to upgrade your ride? Head over to the Law Abiding Bikerβ’ Store and explore the new Chicane Collection by Ciro 3D. Whether youβre adding comfort, style, or performance, these parts are a game-changer for your Harley-Davidson.
Join the Free Email Club!
If you appreciate this free information make sure to join the thousands of law abiding bikers that have already joined the free Email Club! You will be notified of new useful motorcycle content and techniques as we put them out. Join the Community now!
How To Change Harley Rear Wheel Bearings
In this completely free tutorial video, we show you how to change the sealed rear wheel bearings on your Harley Davidson motorcycle. (see video below)
You'll need to remove your rear wheel for this project and we have you covered with a free Harley rear wheel removal video.
SUPPORT US AND SHOP IN THE OFFICIAL LAW ABIDING BIKER STORE
Some riders say they change their Harley rear wheel bearings at every tire change for good measure, however, Harley only recommends you inspect the wheel bearings at each tire change and replace them as necessary. We'll show you how to properly inspect your wheel bearings to see if they need to be changed.
CHECK OUT OUR HUNDREDS OF FREE HELPFUL VIDEOS ON OUR YOUTUBE CHANNEL AND SUBSCRIBE!
In this video, we changed the rear wheel bearings on my 2014 Harley Street Glide Special, and I had 40,000 miles on them before they needed replacement. The front wheel bearings also had 40,000 miles on them but were still fine after inspection. The life of Harley rear wheel bearings can vary greatly. I know some riders that have 100,000 miles on a set of bearings but I'd strongly suggest changing them prior to that even in the inspection goes well. They will fail at some point.
BECOME AN EXCLUSIVE MEMBER AND GET BENEFITS!
You'll need a JIMS Sealed Wheel Bearing Remover and Installer Kit to properly remove and install rear Harley wheel bearings. We also suggest these Harley wheel bearings for replacement. And a Titan Motorcycle Lift and mini jack from our store will certainly make things easier, but not necessary. All these items are available right in the Law Abiding Biker Store.
And although we did this project on a Harley touring model, the video is just as valuable for a non-touring model. The only difference is that on a touring model, you have 4 wheel bearings, two inside the final drive belt sprocket and two in the rear wheel. And, one is an ABS-specific bearing if you have a model with ABS. Your non-touring Harley will only have two bearings in the rear wheel and one may or may not be an ABS bearing, depending on your year and model.
LISTEN TO THE LAW ABIDING BIKER PODCAST!
We show you everything you need to know about Harley rear wheel bearing inspection and replacement for any year and model and regardless of whether you have a model with or without ABS.
We'll also be doing a very detailed Harley front wheel bearing change video, so make sure you're subscribed to our YouTube Channel and turn on notifications so you know when we released that video and many others.
HELP SUPPORT US! JOIN THE BIKER REVOLUTION! #BikerRevolution #LawAbidingBiker #Bikaholics
πSHOP IN THE LAW ABIDING BIKER STORE π
πBECOME A MEMBER AND GET BENEFITS π
πΉGET PREMIUM MOTORCYCLE TUTORIAL VIDEOS πΉ
π¬WATCH OUR MOTORCYCLE DOCUMENTARY FILMS HEREπ¬
π°LEAVE A FLAT DONATION π°
π±SHOP OUR AMAZON RECOMMENDED PRODUCTS π±
πCHECK OUT THE WEEKLY PODCAST π
β FOLLOW US ON FACEBOOK β
π¦ FOLLOW US ON TWITTER π¦
π· FOLLOW US ON INSTAGRAM π·
π FOLLOW US ON TIKTOK π
Join the Free Email Club!
If you appreciate this free information make sure to join the thousands of law abiding bikers that have already joined the free Email Club! You will be notified of new useful motorcycle content and techniques as we put them out. Join the Community now!
Tired of Toxic Motorcycle Groups? Join Our Positive & Supportive Biker Community! Patreon
Hello, fellow Bikeaholics! I'm Ryan Urlacher, owner and founder of Law Abiding Bikerβ’ Media. I sincerely appreciate you taking a moment to explore what it means to become a patron member. By joining, you'll not only support my mission of creating quality motorcycle content but also gain exclusive access and benefits within the largest, safest, and most connected biker community on the internetβand beyond!
Why Become a Patron Member?
This article outlines the benefits of becoming a patron member through a monthly subscription. By joining, you support the videos, podcasts, and articles that I and my team work tirelessly to produce, and you contribute to our mission of educating, entertaining, and inspiring bikers worldwide. In return, you'll enjoy exclusive access and perks as a member of this vibrant community.
What Your Patron Support Means
Creating meaningful content for the biker community requires substantial time, effort, and resources. Patron membership fees help cover these growing costs, allowing me to continue producing content and expanding the reach of Law Abiding Bikerβ’. Every single patron member motivates me to keep pushing forward, knowing the support and appreciation of this incredible community.
How to Sign Up and Choose a Subscription Level
Signing up as a patron is simple! You can join through the Patreon page here. Once there, you'll see different subscription levels, each offering specific benefits. Review each levelβs perks carefully, as the higher the level, the more benefits youβll receive.
Once youβve selected your level, create an account (if you donβt already have one) to gain access to your exclusive benefits. You can easily manage your membership through the Patreon website or mobile app.
A Supportive Community for All Riders
Iβm proud to say that our patron community is inclusive, positive, and supportive. Here, it doesnβt matter what kind of bike you rideβwe welcome all riders! Our members, including myself, ride everything from street to adventure to dirt bikes, so you'll find like-minded people ready to help and connect with you.
Our patron community is designed to be the opposite of many free online groups that can sometimes feel unwelcoming or judgmental. This is a positive space where new and experienced riders alike can share, learn, and meet up for group rides and events.
A Place to Learn and Connect
There are no βdumb questionsβ here! Our community includes riders of all levels, eager to help each other and answer questions. And if you want to connect in person, our Law Abiding Bikerβ’ crew regularly meets up with patrons for group rides and events across the country.
Summary: Join the Largest Biker Community Online!
Signing up as a patron means joining the largest, safest, and most engaged biker community online. By doing so, youβll enjoy a wide range of benefits, from exclusive content to real-life meetups with fellow patrons. Whether youβre a new rider or have years of experience, thereβs a place for you here.
Spread the Word!
Help us grow the Biker Revolution! Share our Patreon page and this article with your friends on social media. Your support allows us to reach even more riders worldwide and strengthen this one-of-a-kind community.
Thank you for your support. Now, letβs keep those knees in the breeze!
Join the Free Email Club!
If you appreciate this free information make sure to join the thousands of law abiding bikers that have already joined the free Email Club! You will be notified of new useful motorcycle content and techniques as we put them out. Join the Community now!
Adding Custom Color to My Harley! PSR Anthem Pro Adjustable Lever Ends & Barrel Adjusters
The new PSR Anthem Pro Adjustable Lever Colored Ends & Barell Adjusters are now available at the Law Abiding Bikerβ’ Store! They are a great way to dress your levers up and really make them pop!
These colored ends and barrel adjusters fit on any PSR Anthem Pro Adjustable Lever.
Unboxing and First Impressions
I recently got my hands on these Anthem Pro lever color ends and barrel adjusters, and I have to say, they meet the high standards youβd expect from a company like PSR. Available in silver, gold, red, and blue, these ends and adjusters offer both style and functionality. While all colors have their appeal, I decided to go with gold on my 2024 Harley-Davidson Street Glide after seeing them in person.
SUPPORT US AND SHOP IN THE OFFICIAL LAW ABIDING BIKER STORE
Features and Adjustability
The PSR Anthem Pro levers are designed to give you maximum control and comfort while riding. Hereβs a closer look at what makes these levers unique:
1. Color and Design Options
- Colored Ends & Adjusters Are Available in silver, gold, red, and blue.
- Each kit includes two lever ends and two barrel adjusters, one setup for the brake side and one for the clutch side.
- The colored lever ends and adjusters add a customized touch to your bike.
2. Adjustable Length and Angle
- The Anthem Pro model allows for both length and angle adjustments.
- The barrel adjuster on each lever makes it easy to change the leverβs reach, bringing it closer or extending it further from the grip.
- This gives you better control and comfort.
3. Attention to Detail
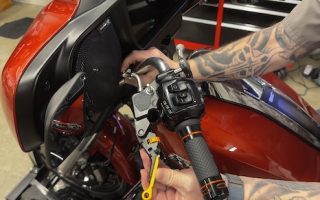
- My video shows you how to quickly and easily switch out to a colored lever end and barrel adjuster.
- The clutch side features regular threads on the barrel adjuster, while the brake side uses reverse threads for consistent adjustment functionality across both levers.
Choose the Right PSR Lever Model
We offer three PSR lever models:
- Anthem Pro: Maximum adjustability.
CHECK OUT OUR HUNDREDS OF FREE HELPFUL VIDEOS ON OUR YOUTUBE CHANNEL AND SUBSCRIBE!
- Anthem: Essential adjustability for standard customization.
- Black or chrome model
- Journey: Streamlined design with essential functionality.
- Black or chrome model
Each model provides a high-quality feel, so choosing comes down to personal preference and the desired level of customization.
Conclusion
The PSR Anthem Pro adjustable levers with colored ends and barrel adjusters provide not only a stylish upgrade to your Harley-Davidson but also improved ergonomics and customization. Iβll be installing these on my own 2024 Street Glide, so stay tuned for a detailed install video on our YouTube channel!
Join the Free Email Club!
If you appreciate this free information make sure to join the thousands of law abiding bikers that have already joined the free Email Club! You will be notified of new useful motorcycle content and techniques as we put them out. Join the Community now!
How to Check and Properly Set Suspension Sag on Your Motorcycle | Slacker Sag Tool Makes It Easy!
Understanding and adjusting the suspension sag on your motorcycle is crucial for improving your ride quality, safety, and handling. Many riders overlook or donβt regularly check their suspension sag, often because they arenβt sure how to do it or think it requires a second person. This guide will walk you through everything you need to know about setting sag, regardless of whether youβre riding a street bike, adventure bike, or dirt bike. Plus, Iβll introduce you to a tool that simplifies the process so you can do it entirely on your ownβthe Slacker Sag Tool. (see video below)
What is Suspension Sag?
Suspension sag is the amount your motorcycle settles or βsquatsβ under its own weight and your weight (including passengers and luggage) when you sit on it. Setting the proper sag is essential because it determines where your suspension will sit within its travel range, allowing it to absorb impacts effectively and create an overall great ride.
Why Proper Sag is Important
Every suspension system is designed with a set amount of travel (usually measured in millimeters). For optimal performance, about one-third of this travel should be set as sag. Setting the correct sag:
- Allows your suspension to move up and down without bottoming out or topping out.
- Keeps your wheels on the ground, ensuring traction, especially over obstacles or uneven surfaces.
- Maintains the correct geometry of your motorcycle for optimal handling.
If your sag is set incorrectly, you risk poor handling and traction, which can be dangerous when encountering obstacles, potholes, or rough terrain.
SUPPORT US AND SHOP IN THE OFFICIAL LAW ABIDING BIKER STORE
Understanding Sag and Preload
When adjusting your sag, you may also hear the term βpreload.β Although they work together, preload is simply the adjustment you make on your suspension to set your desired sag. Some manufacturers, like Harley-Davidson, provide a guideline based on rider and passenger weight, which can help you get close, but fine-tuning is essential to match your specific riding setup.
Measuring Suspension Sag: Tools and Methods
You can measure sag using a basic tape measure, a Motion Pro Sag Scale, or a Slacker Digital Sag Tool. Letβs go over each:
1. Tape Measure Method (Old School)
- This method requires two people, one to hold the bike and the other to measure.
- Use the tape measure to note the suspension height with no weight, then again with the rider seated. The difference is your sag measurement.
While simple, this method can be imprecise due to human error, maintaining the correct angle, and some math involved.
CHECK OUT OUR HUNDREDS OF FREE HELPFUL VIDEOS ON OUR YOUTUBE CHANNEL AND SUBSCRIBE!
2. Motion Pro Folding Sliding Sag Scale
- This tool offers a sliding scale in millimeters, making it easier to get a more accurate reading.
- It requires two people.
- It has an axle bolt pin for maintaining a proper and precise measurement.
- Set the scale on your axle bolt and take readings by lifting the bike, then letting it settle with the rider on board.
3. Slacker Digital Sag Tool
- My personal favorite for ease and accuracy, allowing a one-person operation.
- The tool auto-zeros and provides a digital readout of your sag, removing any guesswork.
- You can also use a Bluetooth remote or app to see the sag measurement on your phone or handlebars, which is especially helpful for fine-tuning on your own.
Step-By-Step Guide to Measuring Sag with the Slacker Digital Sag Tool
- Attach the Slacker Tool:
- For most bikes, attach the tool magnetically to your axle nut.
- Run the toolβs string to a fixed point above (such as your frame) to measure the travel accurately.
- Zero the Tool:
- Lift the bikeβs rear wheel to unload the suspension. The Slacker tool will auto-zero.
- Let the bike settle back down on its suspension.
- Mount and Measure:
- Get on the bike, with both feet on the footpegs or floorboards, and bounce up and down to let the suspension settle.
- Note the sag reading displayed on the remote or appβthis is your sag measurement.
- Adjusting Sag:
- If your sag isnβt within the recommended range (around 25 mm for my Harley touring model), adjust the preload on your shocks and remeasure until you reach the desired sag.
LISTEN TO THE LAW ABIDING BIKER PODCAST!
Example: Calculating the Sag Range (1/3 of your total suspension travel should be your sag)
For example, on my Harley-Davidson Street Glide with 3 inches of rear travel:
- Convert 3 inches to millimeters (3 in x 25.4 mm = 76.2 mm).
- There are 25.4 mm in an inch
- Divide by three (76.2 mm Γ· 3 β 25 mm).
- Aim for 25 mm of sag.
Different motorcycles will have varied travel distances and, consequently, different sag settings. My Husqvarna TE300 sag setting is around 110 mm.
My Recommended Suspension Setup
For my Harley-Davidson Street Glide, I use the Wilbers LDC Nivomat Suspension System, which Iβve reviewed extensively. This suspension automatically adjusts itself based on load, so once itβs set, it recalibrates on the go to maintain the correct sag as I add or remove weight (e.g., passengers or luggage). Itβs incredibly stable, and I highly recommend it for Harley touring bikes. You can find this suspension setup in the Law Abiding Biker Store where we offer customized ordering and support.
Conclusion
Setting sag on your motorcycle is an essential maintenance step for all riders, whether youβre hitting the road, trail, or track. While you can do it with basic tools, investing in a tool like the Slacker Digital Sag Tool makes the process more accurate and saves time. Proper sag ensures your motorcycle handles optimally, increasing safety and ride quality.
For more resources, check out our in-depth suspension videos and guides, including my full review on the Wilbers LDC Nivomat suspension. And if youβre ready to take your ride to the next level, explore our store for high-quality motorcycle parts and accessories!
Join the Free Email Club!
If you appreciate this free information make sure to join the thousands of law abiding bikers that have already joined the free Email Club! You will be notified of new useful motorcycle content and techniques as we put them out. Join the Community now!
Installing A Wind Splitter Windshield On A 2024 & Newer Harley | And A Review!
In this video, I'm installing an 8″ Light Smoked Harley-Davidson Wind Splitter windshield on my 2024 Street Glide, and I give you a detailed review. Additionally, a 10″ model is available. The standard windshield for the 2024 Harley Street Glide and Road Glide is a 5″ variant. (see video below)
Stay tuned to my YouTube Channel as aftermarket options like Klockwerks and F4 Customs are currently in development for the 2024 Harley models and will be featured in upcoming reviews.
HELP SUPPORT US! JOIN THE BIKER REVOLUTION! #BikerRevolution #LawAbidingBiker #Bikaholics
πSHOP IN THE LAW ABIDING BIKER STORE π
πBECOME A MEMBER AND GET BENEFITS π
πΉGET PREMIUM MOTORCYCLE TUTORIAL VIDEOS πΉ
π¬WATCH OUR MOTORCYCLE DOCUMENTARY FILMS HEREπ¬
π°LEAVE A FLAT DONATION π°
π±SHOP OUR AMAZON RECOMMENDED PRODUCTS π±
πCHECK OUT THE WEEKLY PODCAST π
β FOLLOW US ON FACEBOOK β
π¦ FOLLOW US ON TWITTER π¦
π· FOLLOW US ON INSTAGRAM π·
π FOLLOW US ON TIKTOK π
Join the Free Email Club!
If you appreciate this free information make sure to join the thousands of law abiding bikers that have already joined the free Email Club! You will be notified of new useful motorcycle content and techniques as we put them out. Join the Community now!