-
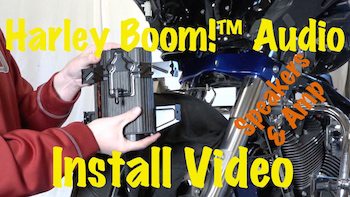
Install a Harley-Davidson Stage 1 or 2 Amp & Speakers on your 2014 to 2023 Harley Davidson touring model with the Boom Box Infotainment System yourself!
-
Save money by not having a dealership do this project.
-
Do it in your garage or on your patio right on the kickstand!
-
Have the pure satisfaction of working on your own Harley!
-
Get greater sound out of your Boom!™ Box system with a Boom Audio amp & speakers.
A Video by Bikers for Bikers!
This tutorial video will work for 2014 to 2023 Harley-Davidson touring models with either a batwing or shark nose style fairings & equipped with the Harley-Davidson Boom!™ Box Infotainment System. This video is for installing the Harley-Davison brand Boom Audio Stage 1 or 2 front amp & speakers. We do run the separate wire harness to the rear in this video for the possible future addition of lid/rear speakers & amp. Even if installing the additional lid/rear amp & speakers on your current project, this video will likely get you 95% the way there & it will just be plugging in things at the rear. This video covers every aspect of front amp & speaker installation & in great detail.
Basic Tools & Items Needed
Tools & items needed: (affiliate links)
- Screwdrivers (standard & phillips)
- Torx head wrenches (standard sizes)
- Standard box end wrenches (American & Metric)
- Standard socket set
- Pliers (standard & needle nose)
- Allen/Hex head wrenches (American)
Overall
-
Harley-Davidson Boom! Audio Stage 2 Speakers & Amp
Summary
Overall, the Harley Boom Audio system ads a ton of high-quality sound and is a great addition to the stock Harley Boom!™ Box Infotainment system. Once you have the Boom Box “re-programmed” or “flashed” after install of the components you will definitely be impressed. The price point is higher compared to competitor systems simply because it is stamped with the Harley logo. However, the Boom Audio system is slightly easier to install compared to some competitor systems, which require some minor splicing. The install instructions that come with the system can confuse any technician. Our official Boom Audio Stage 1 & 2 Speakers & Amp Video makes it a breeze to understand and install the system.
Don't forget to check out our Hogtunes Speakes & Amp Install Video & our Cycle Sounds Speakers & Amp Install Video & our J&M Rokker XX Extreme Speaker and Amp Install Video.
Purchase a Harley Boom Audio Stage 1 or 2 Amp & Speaker Kit through our affiliates!
**Adventure Harley Davidson**
(No additional cost to you, but you can help us out by using the link)
A Video by Biker for Bikers
This tutorial video will work for 2014 to 2023 Harley Davidson touring models with either a batwing or shark nose style fairings & equipped with the Harley-Davidson Boom!™ Box Infotainment System. This video is for installing the Harley-Davison brand Boom Audio Stage 1 or 2 front amp & speakers. We do run the separate wire harness to the rear in this video for the possible future additon of lid/rear speakers & amp. Even if installing the additional lid/rear amp & speakers on your project, this video will likely get you 95% the way there & it will just be plugging in things at the rear. This video covers every aspect of front speaker & amp installation & in great detail.
Note: With a Harley-Davidson brand Boom Audio amp & speakers install you will need a Harley dealership to “flash” or “re-program” your Boom!™ Box Infotainment System to send the appropriate signals to the amp and speakers after install. DO THIS PRIOR to turning on the system after install of amp & speakers or you can damage it. The progrramming software is proprietary of course.
Save your money and do this project yourself right in your garage or on your patio right on the kickstand. No fancy motorcycle lifts, jacks or tools needed.
The video is very thorough and we show you different options for routing and managing wires. We explain what each component actually does and armed with this knowledge the project is a breeze.
As usual, the paper instructions provided by Harley-Davidson with the amp and speaker kit will confuse and frustrate you. That is where this video comes in by breaking it down and showing you exactly how to do each step and why. You will watch in high definition and at the best possible angles. You will listen to actual bikers explain and show things in a way that is easy to understand. It is as if you are right there with us and can reach out and turn a wrench or plug in a wiring harness! This is a video by bikers for bikers. You simply won't find a better Harley-Davidson Boom Audio amp and speaker kit install tutorial video out there.
We suggest mounting your cell phone or music playing device to your handlebars or control cluster using a Biker Gripper. You will certainly want your MP3 player mounted so you can get the most out of your new Boom Audio system.
- Purchase this video now and stream it immediately just like a YouTube video as many times as you like!
- FYI: Here is just one an example of one of our many completely Free tutorial videos, so you can bet our for purchase videos are that and more. Click here to see the detail in that video. And while you are there subscribe to our YouTube channel.
- Tools & items needed: (affiliate links)
As you can see, you don't need that much and can do this project right on the kickstand. So what are you waiting for? Don't waste your money by taking your Harley to a mechanic for this project. Get the tutorial video now and get started! Have the satisfaction of working on your Harley and completing your own projects.
Overall
-
Harley-Davidson Boom! Audio Stage 2 Speakers & Amp
Summary
Overall, the Harley Boom Audio system ads a ton of high-quality sound and is a great addition to the stock Harley Boom!™ Box Infotainment system. Once you have the Boom Box “re-programmed” or “flashed” after install of the components you will definitely be impressed. The price point is higher compared to competitor systems simply because it is stamped with the Harley logo. However, the Boom Audio system is slightly easier to install compared to some competitor systems, which require some minor splicing. The install instructions that come with the system can confuse any technician. Our official Boom Audio Stage 1 & 2 Speakers & Amp Video makes it a breeze to understand and install the system.
Don't forget to check out our Hogtunes Speakes & Amp Install Video & our Cycle Sounds Speakers & Amp Install Video & our J&M Rokker XX Extreme Speaker and Amp Install Video.


How do I watch this on my iPad again in my garage while working on my limited ?
Victor,
The videos stream just like a youtube video. You just need wifi or cellular signal on you iPad. Click the “view product” in your email receipt. Hope your are well and getting some riding in!
Your question will be answered in this detailed video we made & support info we have compiled for you.
CLICK THIS LINK ==> https://www.lawabidingbiker.com/VideoHelp
hi sir one install the new Boom Audio Stage 1 & 2 Speakers & Amp Video fairing only
my bike STREET GLIDE (FLHXS) 2016
Not understanding your question. Here to help.
Hi Ryan,
Just purchased video and watched it ahead of my install on Sunday. Should be no problem! My only question…when I turn on my bike, the radio always turns on to a WB station. Being that the speakers will be damaged if this happens, how do I get the boom system to not turn on after the ignition is turned on? I was thinking of just leaving the amp fuse out till I get to the dealer…
Thanks again! Great videos!!!
Brian
U betcha Brian!! Thanks for the support. Power the Boom Box off. It should not auto turn on when ignition is turned on? Unless something else is wrong.
Ok thanks. I don’t think I have ever turned it off before shutting the bike off lol.
Hello
I installed the stage 2 speakers, but I have no bass even in the audio setup it does no change at all to the bass and the sound is really not good ,the dealer did flash the system twice.
So am not sure is not having any bass could be installation problem or speakers problem or flash problem.
We’ve found in the past that it is the dealer not uploading the correct flash. Assuming installation was done correctly.
~ Matt Couchman
Law Abiding Biker™ Team
Helping as many bikers as we can worldwide!
Would this video still apply to the 2019 street glide?
Yes. Nothing changed really except the new Boom Box GTS radio unit, but the plugs are essentially the same.
Very disappointed in spending $35 on this video! This is a road glide video. No video of actually installing the speakers, touting the speaker wires, or actually how to mount the amp. Does it go on the bracket first. Do you bolt the bracket to the bike first? I’m left to figure this out on my own. You should provide a honest description of this video instead of it being misleading. I would of been better off saving my money and just reading the Harley instructions which is what I will need to do tomorrow when I attempt this install.
And yet another issue found today. When you discuss removing the 2 bolts on the inside bottom of the speaker cabinets – there are actually 3 on the 2019. I had half the front end torn apart before I realized there was a third tucked in there. Extremely dissatisfied and feel you should update the description for this video and provide a refund.
I have a 2014 ultra limited. Buying a used boom system with infotainment head unit included. Can I just use the new head unit that was already set up with the amp and front and rear speakers and not have to get it flashed?
Should work fine.