-
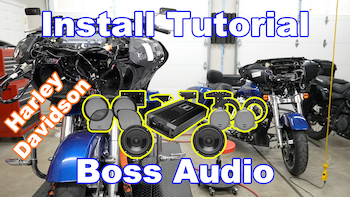
Install a Boss Audio Front Amp & Speakers on your 1998 & Newer Harley Davidson Street Glide, Road Glide, or Electra with stock stereo system to include the Boom Box Infotainment System yourself!
-
Save money by not having a dealership do this project.
-
Do it in your garage or driveway right on the kickstand!
-
Have the pure satisfaction of working on your own Harley!
-
Get great sound out of your stock stereo system with a Boss Audio Amp & Speakers.
-
Buy Boss Audio Speaker & Amplifier Kit in our Store Here!
A Video By Bikers for Bikers
This tutorial video will work for 1998 & newer Harley-Davidson Street Glide, Road Glide, or Electra with either a batwing or shark nose style fairings & equipped with a Harley stereo, including a Harley-Davidson Boom!™ Box Infotainment System. This video is for installing the Boss Audio front amp & speaker kit. This video covers every aspect of a front amp & speaker installation in great detail.
Boss Audio Kit Used in this Video
Items we used in this project:
Boss Audio Amplifier & Front Speaker Kit:
- Boss Audio BHD3F Kit
- All wiring, harnesses, speaker grills, and amplifier plates are included in the kit
Basic Tools & Items Needed
Tools & items needed: (affiliate links)
A Video by Biker for Bikers
This tutorial video will work for 1998 & newer Harley-Davidson Street Glide, Road Glide, or Electra models with either a batwing or shark nose style fairings & equipped with a stock Harley stereo, including the Harley-Davidson Boom!™ Box Infotainment System. This video is for installing the Boss Audio front amp & speakers. This video covers every aspect of a front speaker & amp installation in great detail.
Note: With the Boss Audio front amp & speakers install you will need to “flash” or “re-program” your Boom!™ Box Infotainment System prior to or after installation. Flashing the Boom Box will allow it to recognize the new amp and speaker setup along with putting out the proper levels. Understand that Harley dealerships will no longer flash the Boom Box for you unless you purchase their Harley branded Boom Audio Stage speaker and amp kits. No worries though, because you can just find your nearest Techno Research Dealer and have it flashed. At the time of this video Boss Audio does not have its own download in Tecnho Research and in our video we show you which download to use for optimal sound! You can simply tell your Techno Research Dealer which download to use! We also show you how to adjust the amplifier settings for the best quality sound!
Save your money and do this project yourself right in your shop or garage right on the kickstand. No fancy motorcycle lifts, jacks, or tools are needed.
The video is very thorough and we show you different options for routing and managing wires. We explain what each component actually does and armed with this knowledge the project is a breeze.
As usual, the paper instructions provided by Boss Audio with the amp and speaker kit will confuse and frustrate you. That is where this video comes in, by breaking it down and showing you exactly how to do each step and why. You will watch in high definition and at the best possible angles. You will listen to actual bikers explain and show things in a way that is easy to understand. It is as if you are right there with us and can reach out and turn a wrench or plug in a wiring harness! This is a video by bikers for bikers. You simply won't find a better Boss Audio amp and speaker kit for Harley install tutorial video out there.
Boss Audio kit components we used in this video:
- Boss Audio BHD3F Kit
- All wiring, harnesses, speaker grills, and amplifier plates are included in the kit
We suggest mounting your cell phone or music playing device to your handlebars or control cluster using a Biker Gripper. You will certainly want your music player mounted so you can get the most out of your new Bos Audio system.
- Purchase this video now and stream it immediately just like a YouTube video as many times as you like!
- FYI: Here is just one example of our many completely Free tutorial videos, so you can bet our for purchase videos are that and more. Click here to see the detail in that video. And while you are there subscribe to our YouTube channel.
- Tools & items needed: (affiliate links)
As you can see, you don't need that much and can do this project right on the kickstand. So what are you waiting for? Don't waste your money by taking your Harley to a mechanic for this project. Get the tutorial video now and get started! Have the satisfaction of working on your Harley and completing your own projects.


Leave a Reply