-
Install a Hogtunes amp & speaker kit on your 2014 & Newer Harley Davidson touring model yourself!
-
No need for a dealership to re-program or “flash” your Harley Boom!™ Box system after installing Hogtunes amp & speakers!
-
Save money by not having a dealership do this project.
-
Do it in your garage or on your patio right on the kickstand!
-
Have the pure satisfaction of working on your own Harley!
-
Get better sound out of your Boom!™ Box system with a Hogtunes amp & speakers.
A Video by Bikers for Bikers!
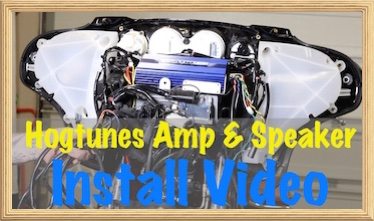
This tutorial video will work for 2014 & newer Harley Davidson touring models. In this particular video we do the install on a 2014 Street Glide Special with no rear passenger OEM speakers. Regardless, we show you how to route the additional wire harness in detail from a 4 channel faring mounted amp in case you are replacing your stock OEM passenger speakers on a touring model like an Ultra Classic. From there it is plug and play.
Basic Tools & Items Needed
Tools & items needed: (affiliate links)
- Screwdrivers (standard & phillips)
- Torx head wrenches (standard sizes)
- Standard box end wrenches (American & Metric)
- Standard socket set
- Wire strippers
- Pliers (standard & needle nose)
- Allen/Hex head wrenches (American)
Overall
-
Hogtunes Amp & Speaker System
Summary
The Hogtunes audio system has the cheapest price point out of all the others. No splicing or stripping is required during installation. The system adds much sound over the stock Harley Boom speakers. The speakers are not separates and the clarity of the sound just is not there like the other more expensive systems. You can definitely hear distortion if you turn it up over half way. The system can be heard at freeway speeds at around 1/2 volume. The install instructions that come with the system can confuse any technician. Our official Hogtunes amp and speaker install tutorial video makes it a breeze to understand and install the system.
Don't forget to check out our Cycle Sounds Speakes & Amp Install Video, our Harley Boom Audio Speakers & Amp Install Video, and our J&M Rokker XX Extreme Amp & Speakers Install Video.
Hogtunes amp & speakers we used
-
Hogtunes 4 channel 200 watt amp (Model: NCA-450 RAM)
- FYI: Only need a 2 channel amp if only doing front fairing speakers
-
Hogtunes 6.5 Gen III 2 ohm (Model 362F-RM) front fairing speakers
Please consider using the below affiliate links to purchase your Hogtunes amp & speakers.
Revzilla | Amazon | J&P Cycles | Motorcycle Superstore
Overall
-
Hogtunes Amp & Speaker System
Summary
The Hogtunes audio system has the cheapest price point out of all the others. No splicing or stripping is required during installation. The system adds much sound over the stock Harley Boom speakers. The speakers are not separates and the clarity of the sound just is not there like the other more expensive systems. You can definitely hear distortion if you turn it up over half way. The system can be heard at freeway speeds at around 1/2 volume. The install instructions that come with the system can confuse any technician. Our official Hogtunes amp and speaker install tutorial video makes it a breeze to understand and install the system.
Don't forget to check out our Cycle Sounds Speakes & Amp Install Video, our Harley Boom Audio Speakers & Amp Install Video, and our J&M Rokker XX Extreme Amp & Speakers Install Video.
Biker Rory Seldon of Walnut, CA says:
Just wanted to drop a note and say that I tried to install the Hogtunes without your video and wasted several hours. Once I purchased the video, installation was a breeze. Great job and well worth the money!!!!
Purchase a Hogtunes Amp & Speaker Kit through our affiliates!
Revzilla | Amazon | J&P Cycles | Motorcycle Superstore
A Video by Biker for Bikers
In this tutorial video we install a Hog Tunes Amp & Speaker Kit on a Harley Davidson motorcycle. This #1 rated tutorial video will work for 2014 & newer Harley Davidson touring models. In this particular video we do the install on a 2014 Street Glide Special with no rear passenger OEM speakers. Regardless, we show you how to route the additional wire harness in detail from a 4 channel faring mounted amp in case you are replacing your stock OEM passenger speakers on a touring model like an Ultra Classic. From there it is plug and play.
Note: With a Hogtunes amp & speaker install there is no need to take your Harley to a dealership for a Dealer Digital Technician software update or “flash” of your Boom!™ Box Infotainment System. It is required with other amp & speaker systems and the dealership will charge you to do so.
Save your money and do this project yourself right in your garage or on your patio right on the kickstand. No fancy motorcycle lifts, jacks or tools needed.
The video is very thorough and we show you different options for routing and managing wires. We explain what each component actually does and armed with this knowledge the project is a breeze.
As usual, the paper instructions provided by Hogtunes with the amp and speaker kit are less than useful or helpful. That is where this video comes in by breaking it down and showing you exactly how to do each step and why. You will watch in high definition and at the best possible angles. It is as if you are right there with us and can reach out and turn a wrench! This is a video by bikers for bikers. You simply won't find a better Hogtunes amp and speaker kit install tutorial video out there.
We also have some great options for mounting your particular music playing device to your handlebars or control cluster. You will certainly want your MP3 player mounted so you can get the most out of your new Hogtunes system. We even install one of these Biker Gripper smartphone/music player mounts in the video and show you how.
- Purchase it now and stream it immediately just like a YouTube video as many times as you like!
- FYI: Here is just one an example of one of our many completely Free tutorial videos, so you can bet our for purchase videos are that and more. Click here to see that detail in that video. And while you are there subscribe to our YouTube channel.
Tools & items needed: (affiliate links)
- Screwdrivers (standard & phillips)
- Torx head wrenches (standard sizes)
- Standard box end wrenches (American & Metric)
- Standard socket set
- Wire strippers
- Pliers (standard & needle nose)
- Allen/Hex head wrenches (American)
As you can see, you don't need that much and can do this project right on the kickstand. So what are you waiting for? Don't waste your money by taking your Harley to a mechanic for this project. Get the tutorial video now and get started! Have the satisfaction of working on your Harley and completing your own projects.
Overall
-
Hogtunes Amp & Speaker System
Summary
The Hogtunes audio system has the cheapest price point out of all the others. No splicing or stripping is required during installation. The system adds much sound over the stock Harley Boom speakers. The speakers are not separates and the clarity of the sound just is not there like the other more expensive systems. You can definitely hear distortion if you turn it up over half way. The system can be heard at freeway speeds at around 1/2 volume. The install instructions that come with the system can confuse any technician. Our official Hogtunes amp and speaker install tutorial video makes it a breeze to understand and install the system.
Don't forget to check out our Cycle Sounds Speakes & Amp Install Video, our Harley Boom Audio Speakers & Amp Install Video, and our J&M Rokker XX Extreme Amp & Speakers Install Video.


I have the Harley stage2 speakers and amps.Both amps in the fairing for the fairing speakers and for the lower fairing speakers now I would like to add lid speakers and a amp in the saddle bag.Do you have a video that I can purchase for the Bad Ass HogTune system for that choice it’s a 2016 R/G Special .If I had known about Law Abiding Biker/HogTunes over that high price H-D stuff my choice would have been HogTunes.
We only have the video for the HogTunes System up front LeDaon. Thaks for your support. All our list of for purchase premium videos are here: https://www.lawabidingbiker.com/buyvideos
Many Thanks Ryan. Your video on installing Hogtunes amp and speakers gave me the confidence to tackle this installment. Your detail instructions made it simple. Also like the fact that you gave us options for a better installation base on your experience. I did take my time so I can’t quote on how long it took me. I can say that without your video I’ve would not have made an attempt to install base on the instruction that came with the units. Thanks again.
That puts a smile on my face………..makes it worth all the hard work. Love helping bikers…thanks for the shout out.
I have a 2017 ultra classic, do I or don’t I need the radio flash for the install? I’m torn from all the flash hype…some say yes some say no. Can you help me please?