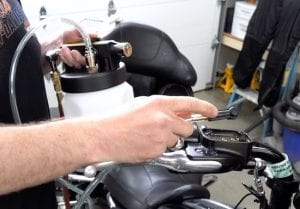
Harley-Davidson recommends that you replace/flush the DOT 4 brake fluid in your Harley brake system every two years regardless of mileage. In this completely free tutorial video, we show you how to flush your Harley brake system right in your own shop or garage with minimal tools, so you don't have to pay a Harley dealership to do it.
SUPPORT US AND SHOP IN THE OFFICIAL LAW ABIDING BIKER STORE
Here are some affiliate links to equipment we used to do this project. No additional cost to you, but if you click through and make a purchase we get a small commision. It helps support free videos like this!
- MV8000 Automotive Tune-up and Brake Bleeding Kit
- Used this for years and it works great
- Mityvac MV6835 Vacuum Brake Bleeding Kit
- What we used for this film project and loved it!
- Brake Fluid Tester – calibrated for DOT 4 brake fluids
- Test the moisture level in your DOT 4 fluid
Bleeding your Harley brake system and flushing the system is basically the same process. When bleeding your brake system, you just add new fluid to the old in the master cylinder and pull fluid through the lines until you get all the air out of the system. When you flush your Harley brake system, you are replacing all your old brake fluid with new. You remove all old fluid from the master cylinder and then put new fluid in and bleed the brake system until all the old fluid is evacuated along with any air, thus having all new fluid in the brake system.
Why should you flush your Harley brake system every two years you ask?
As DOT 4 brake fluid in your Harley ages, its chemical properties deteriorate and it absorbs water. This changes the physical properties of the DOT 4 brake fluid, which can lead to braking issues such as soft or spongy brakes. Left unchanged, it could lead to complete brake failure.
As mentioned, DOT 4 brake fluid absorbs water. Because water boils at 212°F, less than half the temperature of brake fluid, any water in the brake fluid dramatically reduces its boiling point. When brake fluid boils it converts any water in the fluid to gas. And because gas is more compressible than liquid, when brake fluids boil, the brake lever or pedal can start to feel “soft,” requiring the rider to pump the brakes to create sufficient pressure to slow the motorcycle.
CHECK OUT OUR HUNDREDS OF FREE HELPFUL VIDEOS ON OUR YOUTUBE CHANNEL AND SUBSCRIBE!
Recommended items for this project:
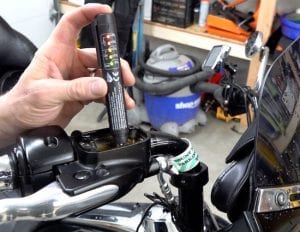
In this tutorial video, we use a Mityvac MV6835 Vacuum Brake Bleeding Kit, which will help you easily flush your Harley brake system. A less expensive brake bleeding kit we used for years is the MV8000 Automotive Tune-up and Brake Bleeding Kit & it works very well. We also use a Brake Fluid Tester to test the DOT 4 brake fluid for moisture. If you ever find your Harley brake fluid has 3.7% or higher water content by volume, it’s recommended that you change it, even if it hasn’t been two years.
This brake fluid issue discussed in this article is not specific to Harley as all motorcycles use much of the same DOT 4 brake fluid. Harley was just getting ahead of the game and recommending changing it out every two years to avoid any problems. You should do this on your motorcycle regardless of what make.
Tip: Don't store your opened unsealed DOT 4 brake fluid for any length of time. You can discard it after you use it. Once unsealed, DOT 4 brake fluid will collect moisture and that's exactly why we're flushing our systems in the first place.
Join the Free Email Club!
If you appreciate this free information make sure to join the thousands of law abiding bikers that have already joined the free Email Club! You will be notified of new useful motorcycle content and techniques as we put them out. Join the Community now!


