How To Change Harley Rear Wheel Bearings
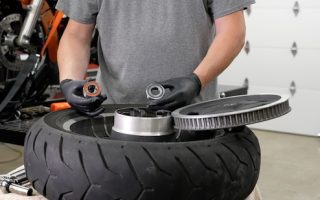
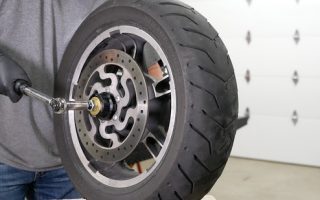
In this completely free tutorial video, we show you how to change the sealed rear wheel bearings on your Harley Davidson motorcycle. (see video below)
You'll need to remove your rear wheel for this project and we have you covered with a free Harley rear wheel removal video.
SUPPORT US AND SHOP IN THE OFFICIAL LAW ABIDING BIKER STORE
Some riders say they change their Harley rear wheel bearings at every tire change for good measure, however, Harley only recommends you inspect the wheel bearings at each tire change and replace them as necessary. We'll show you how to properly inspect your wheel bearings to see if they need to be changed.
CHECK OUT OUR HUNDREDS OF FREE HELPFUL VIDEOS ON OUR YOUTUBE CHANNEL AND SUBSCRIBE!
In this video, we changed the rear wheel bearings on my 2014 Harley Street Glide Special, and I had 40,000 miles on them before they needed replacement. The front wheel bearings also had 40,000 miles on them but were still fine after inspection. The life of Harley rear wheel bearings can vary greatly. I know some riders that have 100,000 miles on a set of bearings but I'd strongly suggest changing them prior to that even in the inspection goes well. They will fail at some point.
BECOME AN EXCLUSIVE MEMBER AND GET BENEFITS!
You'll need a JIMS Sealed Wheel Bearing Remover and Installer Kit to properly remove and install rear Harley wheel bearings. We also suggest these Harley wheel bearings for replacement. And a Titan Motorcycle Lift and mini jack from our store will certainly make things easier, but not necessary. All these items are available right in the Law Abiding Biker Store.
And although we did this project on a Harley touring model, the video is just as valuable for a non-touring model. The only difference is that on a touring model, you have 4 wheel bearings, two inside the final drive belt sprocket and two in the rear wheel. And, one is an ABS-specific bearing if you have a model with ABS. Your non-touring Harley will only have two bearings in the rear wheel and one may or may not be an ABS bearing, depending on your year and model.
LISTEN TO THE LAW ABIDING BIKER PODCAST!
We show you everything you need to know about Harley rear wheel bearing inspection and replacement for any year and model and regardless of whether you have a model with or without ABS.
We'll also be doing a very detailed Harley front wheel bearing change video, so make sure you're subscribed to our YouTube Channel and turn on notifications so you know when we released that video and many others.
HELP SUPPORT US! JOIN THE BIKER REVOLUTION! #BikerRevolution #LawAbidingBiker #Bikaholics
🛒SHOP IN THE LAW ABIDING BIKER STORE 🛒
😎BECOME A MEMBER AND GET BENEFITS 😎
📹GET PREMIUM MOTORCYCLE TUTORIAL VIDEOS 📹
🎬WATCH OUR MOTORCYCLE DOCUMENTARY FILMS HERE🎬
📱SHOP OUR AMAZON RECOMMENDED PRODUCTS 📱
🎙CHECK OUT THE WEEKLY PODCAST 🎙
Join the Free Email Club!
If you appreciate this free information make sure to join the thousands of law abiding bikers that have already joined the free Email Club! You will be notified of new useful motorcycle content and techniques as we put them out. Join the Community now!
Adding Custom Color to My Harley! PSR Anthem Pro Adjustable Lever Ends & Barrel Adjusters
The new PSR Anthem Pro Adjustable Lever Colored Ends & Barell Adjusters are now available at the Law Abiding Biker™ Store! They are a great way to dress your levers up and really make them pop!
These colored ends and barrel adjusters fit on any PSR Anthem Pro Adjustable Lever.
Unboxing and First Impressions
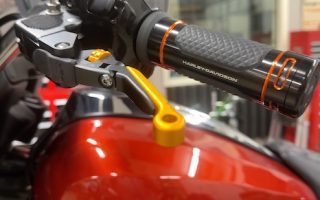
I recently got my hands on these Anthem Pro lever color ends and barrel adjusters, and I have to say, they meet the high standards you’d expect from a company like PSR. Available in silver, gold, red, and blue, these ends and adjusters offer both style and functionality. While all colors have their appeal, I decided to go with gold on my 2024 Harley-Davidson Street Glide after seeing them in person.
SUPPORT US AND SHOP IN THE OFFICIAL LAW ABIDING BIKER STORE
Features and Adjustability
The PSR Anthem Pro levers are designed to give you maximum control and comfort while riding. Here’s a closer look at what makes these levers unique:
1. Color and Design Options
- Colored Ends & Adjusters Are Available in silver, gold, red, and blue.
- Each kit includes two lever ends and two barrel adjusters, one setup for the brake side and one for the clutch side.
- The colored lever ends and adjusters add a customized touch to your bike.
2. Adjustable Length and Angle
- The Anthem Pro model allows for both length and angle adjustments.
- The barrel adjuster on each lever makes it easy to change the lever’s reach, bringing it closer or extending it further from the grip.
- This gives you better control and comfort.
3. Attention to Detail
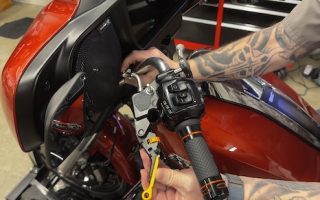
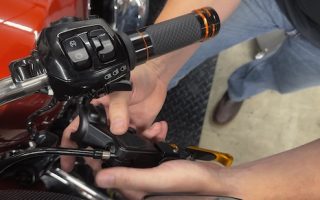
- My video shows you how to quickly and easily switch out to a colored lever end and barrel adjuster.
- The clutch side features regular threads on the barrel adjuster, while the brake side uses reverse threads for consistent adjustment functionality across both levers.
Choose the Right PSR Lever Model
We offer three PSR lever models:
- Anthem Pro: Maximum adjustability.
CHECK OUT OUR HUNDREDS OF FREE HELPFUL VIDEOS ON OUR YOUTUBE CHANNEL AND SUBSCRIBE!
- Anthem: Essential adjustability for standard customization.
- Black or chrome model
- Journey: Streamlined design with essential functionality.
- Black or chrome model
Each model provides a high-quality feel, so choosing comes down to personal preference and the desired level of customization.
Conclusion
The PSR Anthem Pro adjustable levers with colored ends and barrel adjusters provide not only a stylish upgrade to your Harley-Davidson but also improved ergonomics and customization. I’ll be installing these on my own 2024 Street Glide, so stay tuned for a detailed install video on our YouTube channel!
Join the Free Email Club!
If you appreciate this free information make sure to join the thousands of law abiding bikers that have already joined the free Email Club! You will be notified of new useful motorcycle content and techniques as we put them out. Join the Community now!
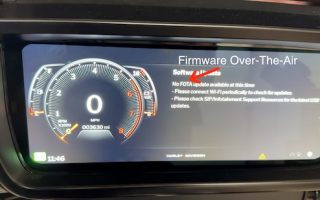
Installing A Wind Splitter Windshield On A 2024 & Newer Harley | And A Review!
In this video, I'm installing an 8″ Light Smoked Harley-Davidson Wind Splitter windshield on my 2024 Street Glide, and I give you a detailed review. Additionally, a 10″ model is available. The standard windshield for the 2024 Harley Street Glide and Road Glide is a 5″ variant. (see video below)
Stay tuned to my YouTube Channel as aftermarket options like Klockwerks and F4 Customs are currently in development for the 2024 Harley models and will be featured in upcoming reviews.
HELP SUPPORT US! JOIN THE BIKER REVOLUTION! #BikerRevolution #LawAbidingBiker #Bikaholics
🛒SHOP IN THE LAW ABIDING BIKER STORE 🛒
😎BECOME A MEMBER AND GET BENEFITS 😎
📹GET PREMIUM MOTORCYCLE TUTORIAL VIDEOS 📹
🎬WATCH OUR MOTORCYCLE DOCUMENTARY FILMS HERE🎬
📱SHOP OUR AMAZON RECOMMENDED PRODUCTS 📱
🎙CHECK OUT THE WEEKLY PODCAST 🎙
Join the Free Email Club!
If you appreciate this free information make sure to join the thousands of law abiding bikers that have already joined the free Email Club! You will be notified of new useful motorcycle content and techniques as we put them out. Join the Community now!
Step-by-Step: Adjust Your 2024 Harley’s Rear Suspension Like a Pro
I'm going to walk you through how to properly adjust the rear suspension on your 2024 and newer Harley-Davidson Touring motorcycle. With the 2024 redesign, Harley-Davidson has made some changes to how the suspension is adjusted, particularly when it comes to preload settings. Let's break it all down. (see video below)
Understanding the Preload Adjusters
The 2024 models feature two types of preload adjusters:
- Right side: Threaded preload adjuster (for gross adjustments)
- Left side: Hydraulic preload adjuster (for fine adjustments)
SUPPORT US AND SHOP IN THE OFFICIAL LAW ABIDING BIKER STORE
The right side's threaded preload adjuster is your primary adjustment. This is where you'll set the preload based on the weight of the rider and passenger. The left side hydraulic adjuster allows you to make finer tweaks on the go—perfect if you add gear or a lighter passenger without needing to adjust the right side every time.
Step 1: Setting the Right Side Preload (Threaded Adjuster)
Before making any adjustments, refer to your owner's manual, which includes a preload adjuster chart. This chart helps you set the right-side preload based on your weight, the passenger's weight, and any luggage you’re carrying.
CHECK OUT OUR HUNDREDS OF FREE HELPFUL VIDEOS ON OUR YOUTUBE CHANNEL AND SUBSCRIBE!
For example, if you weigh 180 lbs and don't typically carry a passenger, you’ll set the adjuster ring and lock ring at the minimum setting—essentially zero millimeters of spacing. If you occasionally carry a passenger, you would adjust the rings according to the chart.
Here’s how you can set the threaded preload:
- Reference the chart: Find your weight and your passenger's weight in the chart.
- Measure the distance: The chart will provide a value in millimeters that represents the distance between the top of the adjuster ring and the bottom of the lock ring. This is your gross adjustment.
- Adjust the ring: Using the spanner wrench that came with your bike (or you can purchase one online), turn the adjuster ring clockwise to increase preload or counterclockwise to decrease it.
- Lock it in: Once you've set the proper distance, lock the adjuster by tightening the lock ring with the spanner wrench.
Step 2: Fine Tuning with the Left Side Hydraulic Adjuster
Once your right-side preload is set, the left-side hydraulic adjuster lets you make quick adjustments on the fly without a wrench. This feature is ideal for those times when you throw on a few extra pounds of luggage or take on a lighter passenger.
LISTEN TO THE LAW ABIDING BIKER PODCAST!
Here’s how to use the hydraulic adjuster:
- Check the chart again: For example, if you add 50 lbs of luggage, the chart may suggest 11 turns from the minimum setting.
- Adjust the knob: Remove the saddlebag (it only takes a minute) and turn the hydraulic knob based on the additional weight. The adjuster has tactile clicks, so you can easily feel each turn.
- Make quick changes: As you add or remove weight (like luggage), you can adjust the knob accordingly. For instance, each click may correspond to an additional 20-25 lbs, making it simple to fine-tune your suspension without tools.
A Note on Stock Suspension
Now that your suspension is set, you may notice that while it's good, there's definitely much room for improvement. That's why, here at Law Abiding Biker™, we often recommend upgrading to Wilbers LDC Nivomat suspension for a superior ride. We’ve tested it extensively, and once you try it, you’ll wonder how you ever rode on the stock suspension!
We offer Wilbers suspension right in the Law Abiding Biker Store, and when you order from us, we'll ask you a few questions to tailor the setup to your specific needs. Plus, we provide a detailed video tutorial so you can install it yourself without needing to pay a mechanic.
Conclusion
Adjusting the suspension on your 2024 or newer Harley-Davidson Touring model is a straightforward process once you understand the different adjusters. Following these steps will ensure a smooth, comfortable ride tailored to your weight and riding conditions.
If you're ready to take your ride to the next level, check out Wilbers suspension in our store. We’re a small team of bikers helping other bikers worldwide, and we’d love to get you set up with the best suspension for your Harley.
Additional Resources
Ride safe, and thank you for being a part of the Law Abiding Biker™ community!
Join the Free Email Club!
If you appreciate this free information make sure to join the thousands of law abiding bikers that have already joined the free Email Club! You will be notified of new useful motorcycle content and techniques as we put them out. Join the Community now!
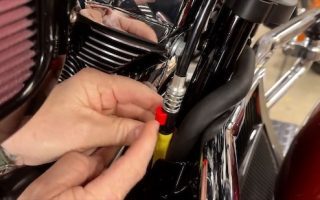
Quick & Easy: How to Install 4-Point Docking Hardware on Your Harley-Davidson | 2024 To Present Models
Installing 4-point docking hardware on your Harley-Davidson is essential for any rider. It enables you to easily add a quick-detach passenger backrest, luggage rack, or even a trunk. Whether you're planning long-distance tours or just want to bring a passenger along comfortably, this upgrade is a must. In this video, I’ll walk you through the step-by-step process of installing the OEM 4-point docking hardware system on a 2024 to present Harley.
Tutorial Video-How to Install 4 or 2 point docking hardware on a pre-2024 Harley Video
HELP SUPPORT US! JOIN THE BIKER REVOLUTION! #BikerRevolution #LawAbidingBiker #Bikaholics
🛒SHOP IN THE LAW ABIDING BIKER STORE 🛒
😎BECOME A MEMBER AND GET BENEFITS 😎
📹GET PREMIUM MOTORCYCLE TUTORIAL VIDEOS 📹
🎬WATCH OUR MOTORCYCLE DOCUMENTARY FILMS HERE🎬
📱SHOP OUR AMAZON RECOMMENDED PRODUCTS 📱
🎙CHECK OUT THE WEEKLY PODCAST 🎙
Join the Free Email Club!
If you appreciate this free information make sure to join the thousands of law abiding bikers that have already joined the free Email Club! You will be notified of new useful motorcycle content and techniques as we put them out. Join the Community now!
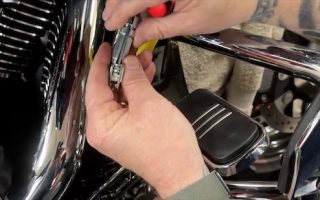
How I Secure My Dirt Bike in Seconds with This Game-Changing System-Risk Racing Lock N Load
Transporting your dirt bike after a long day on the trails or at the race track can be a frustrating task. Traditional straps are cumbersome, inconsistent, and often require a tedious back-and-forth process that risks tipping your bike. I’ve been using the Risk Racing Lock N Load Strapless Moto Transport System for some time now, and I’m excited to share why I’ll never go back to using those old straps again. This system is so impressive that I immediately added it to the Law Abiding Biker Store.
The Hassle of Traditional Straps
Let’s face it—loading your bike into a truck or trailer using traditional straps is far from ideal. You have to constantly switch sides to adjust the tension, making sure it’s just right. If you’re transporting two bikes side by side, the process becomes even more frustrating. And when you get home, the struggle starts all over again as you carefully remove the straps, hoping your bike doesn’t tip over. After a long, exhausting day, this is the last thing any rider wants to deal with.
SUPPORT US AND SHOP IN THE OFFICIAL LAW ABIDING BIKER STORE
Why I Chose Risk Racing Over Bike Binderz
You may have seen ads for the Bike Binderz system, featuring bikes suspended upside down on a piece of sheet metal. While this may catch your eye on social media, it doesn’t translate to real-world practicality. I don’t remember the last time I drove my truck upside down, and I doubt you do either.
When you watch Bike Binderz's own promotional video, you’ll notice the rider has to go through a cumbersome process to secure the bike. Bending over the bike multiple times, reaching down to attach tie-down chains, and fiddling with safety pins—this is exactly what I wanted to avoid. After all, traditional straps can do the same thing at a lower cost.
The Superiority of the Lock N Load System
In contrast, the Risk Racing Lock N Load Strapless Moto Transport System offers a far more refined and efficient solution. This system uses rigid aluminum lock-down arms instead of chains, making the process quick and effortless. There’s no need to bend over your bike repeatedly. Simply push down on the arms, and it ratchets down on the peg and locks securely. Repeat the process on the other side, and you’re done. You barely have to lean over the opposite side of your bike.
CHECK OUT OUR HUNDREDS OF FREE HELPFUL VIDEOS ON OUR YOUTUBE CHANNEL AND SUBSCRIBE!
Unloading your bike is just as easy. Release the lock levers, push down on each arm to raise them, and back your bike out. It’s that simple. Every time I use this system, it puts a smile on my face because I know I’m on the road or back on the trails in no time.
Proven Performance and Reliability
Your bike is incredibly secure when locked into the Risk Racing system. I’ve driven on rough, 4WD roads and tackled steep hills, ruts, and bumps without any concerns about my bike’s safety. This system has been tried and tested by me many times, and it has never let me down.
LISTEN TO THE LAW ABIDING BIKER PODCAST!
Easy Installation and Universal Appeal
Installing the Risk Racing Lock N Load Strapless Moto Transport System in the bed of your truck or trailer is a breeze. I walk you through the installation process in my video, showing just how quick and easy it is.
At the track or trails, riders often stop to ask me about the system when they see how fast and effortlessly I load and unload my bike. It’s clear that riders are tired of struggling with traditional straps, and this system offers the perfect solution.
Conclusion
I highly recommend the Risk Racing Lock N Load Strapless Moto Transport System to anyone looking for a more efficient and secure way to transport their bike. It’s a game-changer that will make you wonder why you didn’t switch sooner. Trust me, you won’t be disappointed!
Join the Free Email Club!
If you appreciate this free information make sure to join the thousands of law abiding bikers that have already joined the free Email Club! You will be notified of new useful motorcycle content and techniques as we put them out. Join the Community now!
- 1
- 2
- 3
- …
- 21
- Next Page »